Hello!I have had lots of questions about my wholecloth quilting process, so I’ve decided to write it down here for anyone looking for advice. I wanted to say in advance that I didn’t come up with this method, and I’m not an expert by any means, but I have learned my own tips and tricks that could maybe help someone.
Step 1: The Design
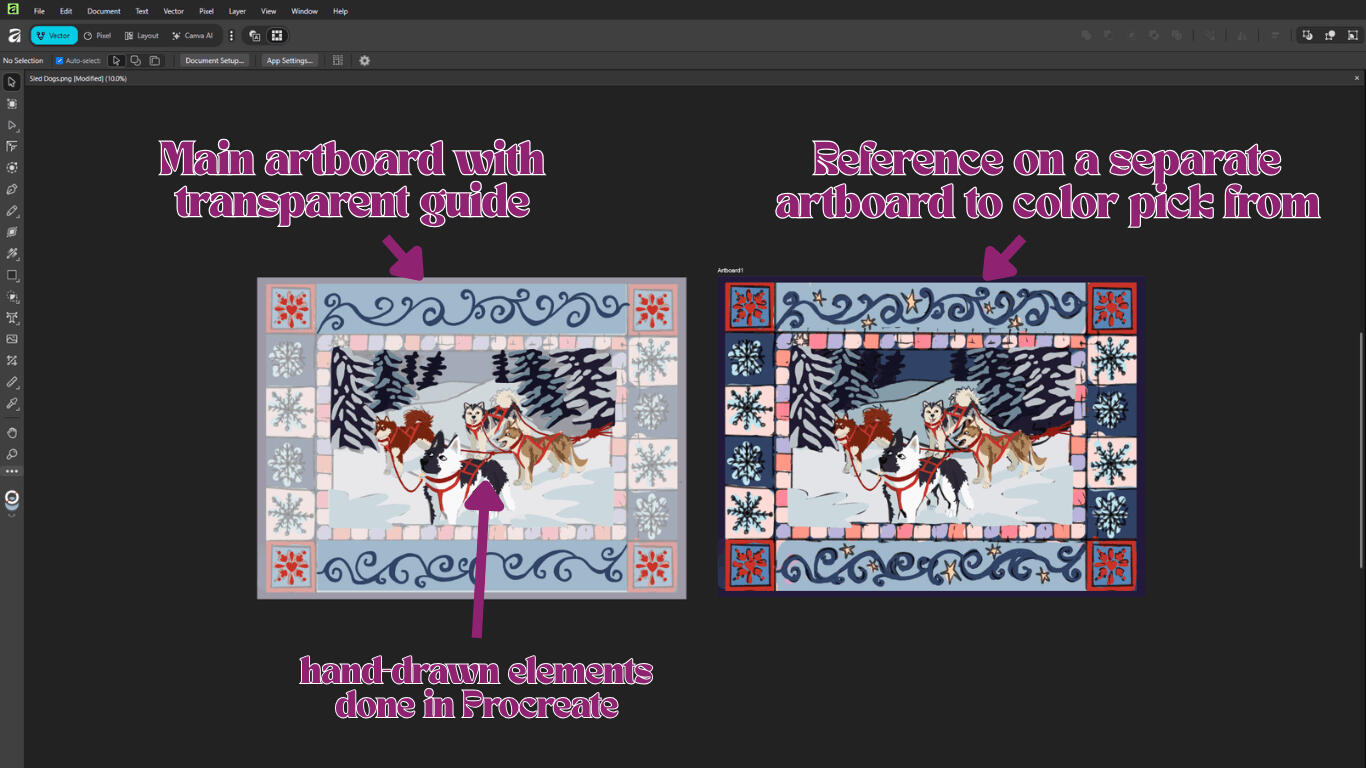
I use a mixture of Procreate and photo editing software to make my quilts. Important things I’ve found are to ensure your canvas is at least 300dpi, the color settings are formatted to match wherever you’re getting the fabric printed (for me that’s sRGB), and that the canvas is sized in inches as big as you want the finished piece to be.My process is to use Affinity Photo (it’s free!) for the quilting blocks so they’re accurate and crisp, and Procreate for the hand-drawn elements. There is a bit of a learning curve for photo editing software, but it’s so worth it in my opinion.
I usually order multiple panels at a time, so I put 3 or 4 together on an appropriately sized canvas and then add seam allowance to each panel.
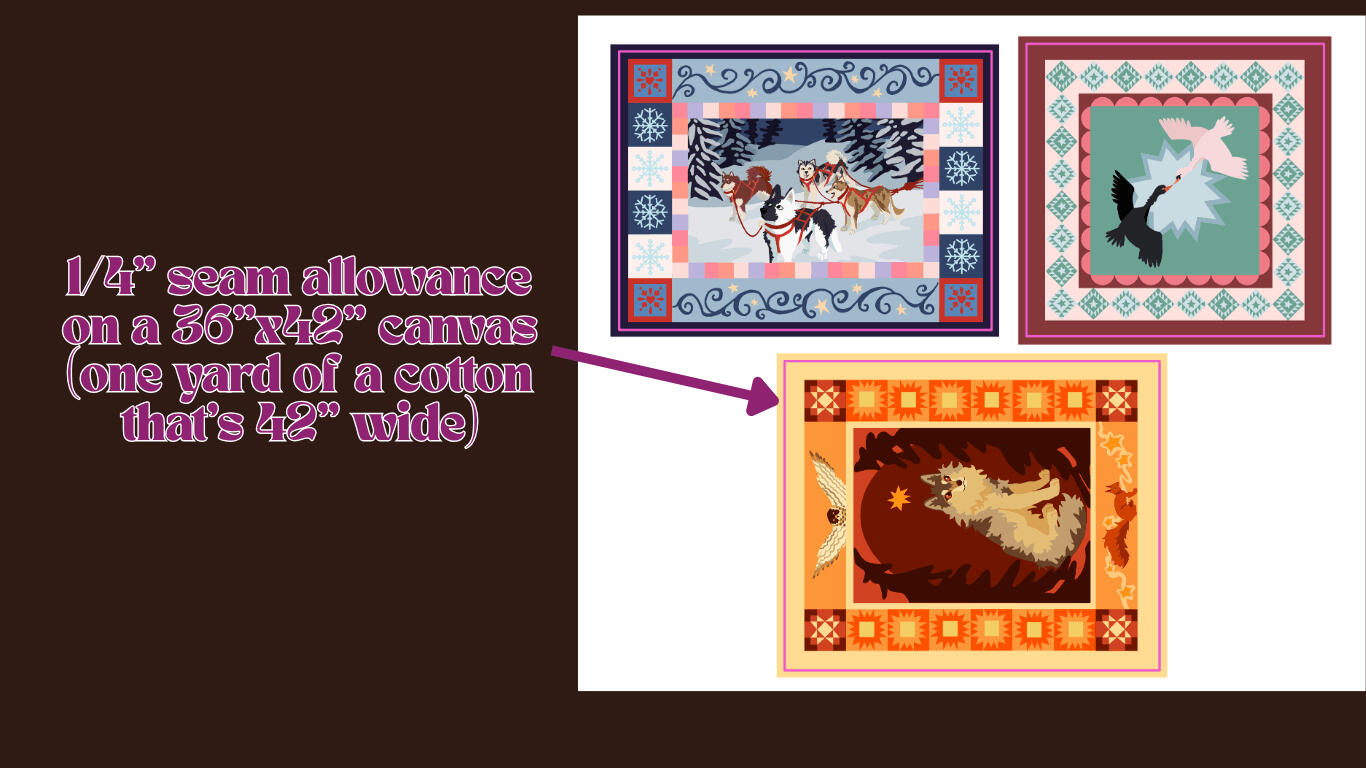
I personally order my fabric from Raspberry Creek Fabrics, but there are other options out there such as Spoonflower. Make sure you follow best printing practices and size your design correctly.
Step 2: The Base
Cut out your panel, batting, and backing. You can cut your batting and backing to size or cut it a little bigger. If you have light-colored backing, it’s easy to see the fabric panel underneath to know where to sew; for dark or patterned backings I cut it to size so I can just sew a quarter inch in and have the correct seam allowance.I cannot stress enough how important ironing is! I iron every piece multiple times as I’m making it. Iron your panel after you’ve cut it out. If your batting is wrinkled from being folded, you can spray it with some water and tumble dry for a few minutes. This gets rid of lumps.I make my quilts by layering the batting, then the panel right-side-up, then the backing. You can also layer them normally (backing, batting, panel) and bind them after quilting in whatever traditional quilt-binding method you prefer.
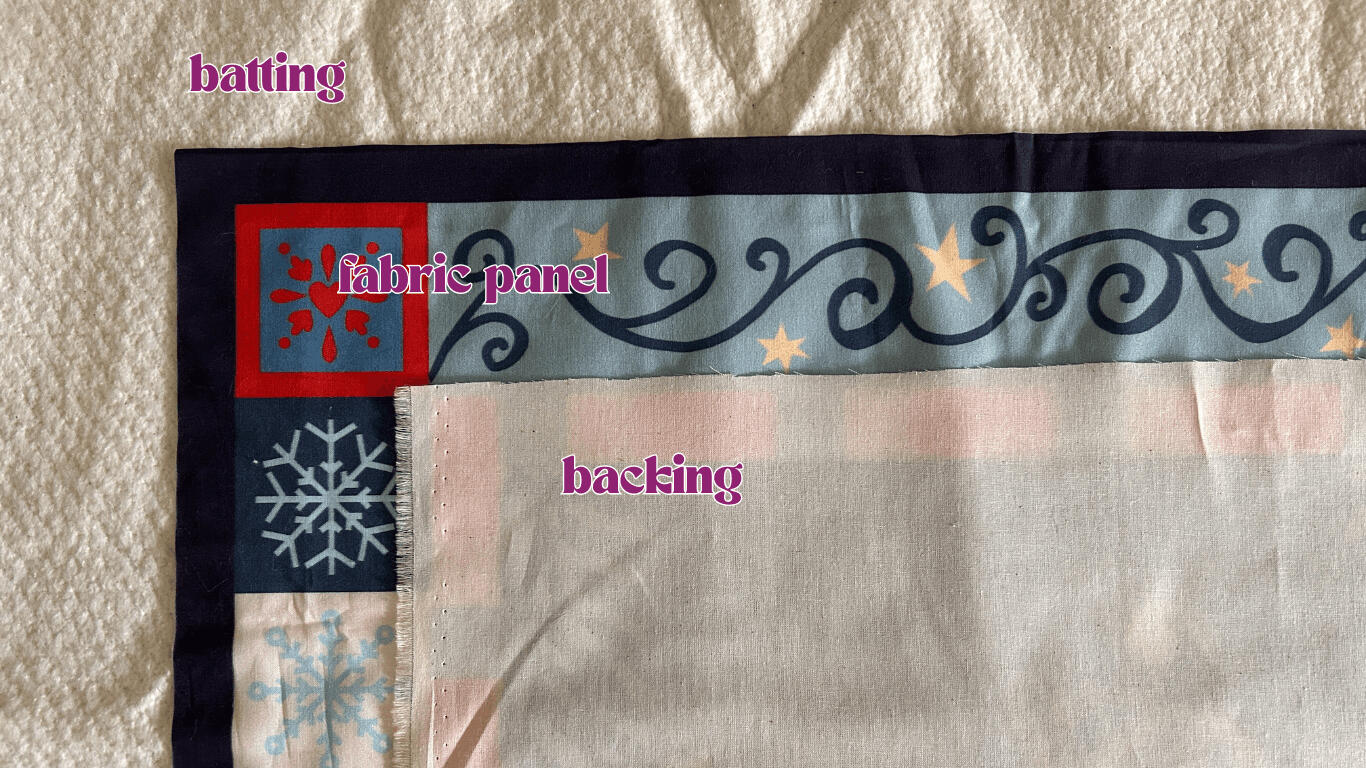
I’ve done both one layer and two layers of batting - it’s up to your personal preference! One layer tends to lay flatter.

Pin and sew around the edge of the panel with seam allowance. Make sure you leave a 3-4 inch gap, and don’t make that gap at a corner. Turn your piece inside out, so the batting is in the middle, and iron again.You can close the gap with a ladder stitch (my preferred method), or by tucking the fabric under and topstitching over it with a matching thread color.

Step 3: The Quilting
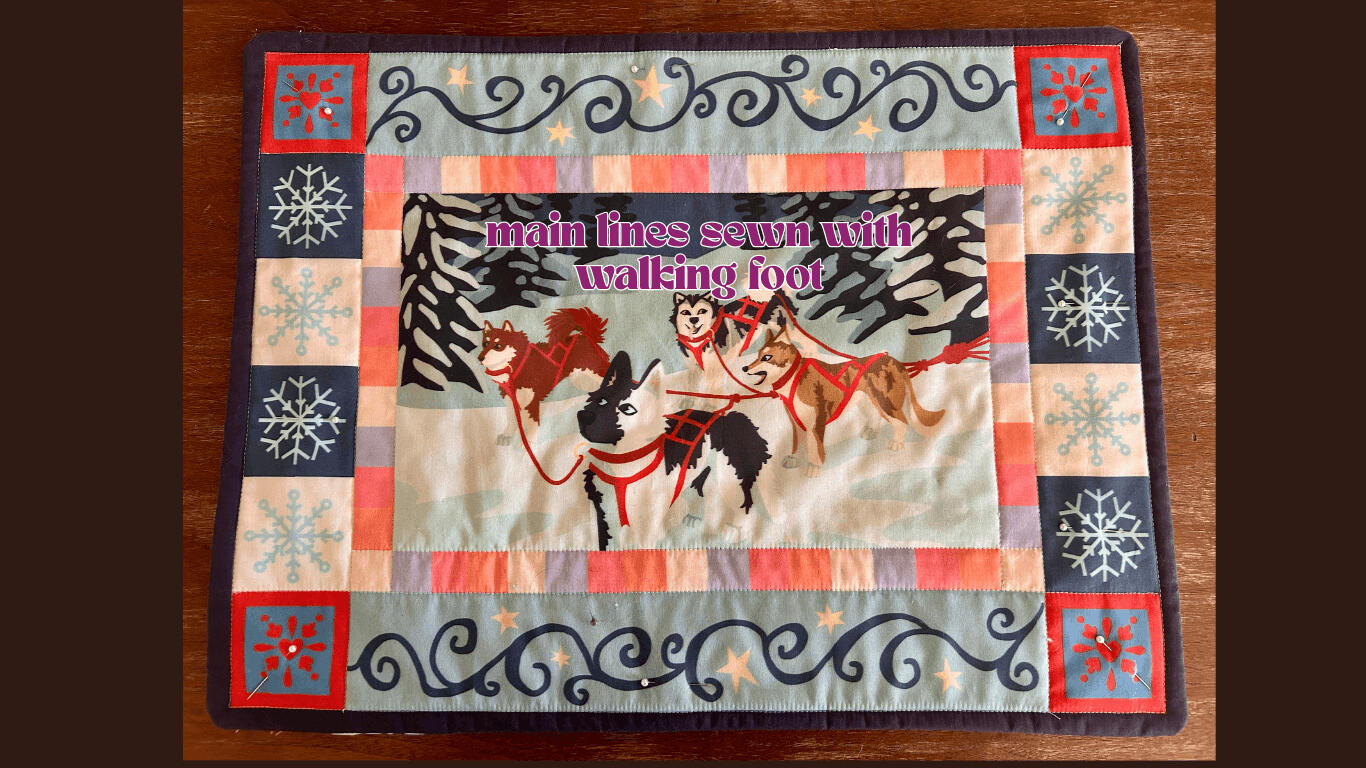
Now for the fun part! I always pin baste the layers together before sewing anything. I then start my quilts by sewing over the main borders with my walking foot. In my experience, this minimizes bunching at corners. I typically lengthen my stitch for this.At this point, you can either use a presser foot of your choice to sew around the lines normally, with stopping and lifting to pivot, or you can use a free motion quilting foot. Presser feet are more accurate and tend to be a lot more even, but it can take a lot more time.
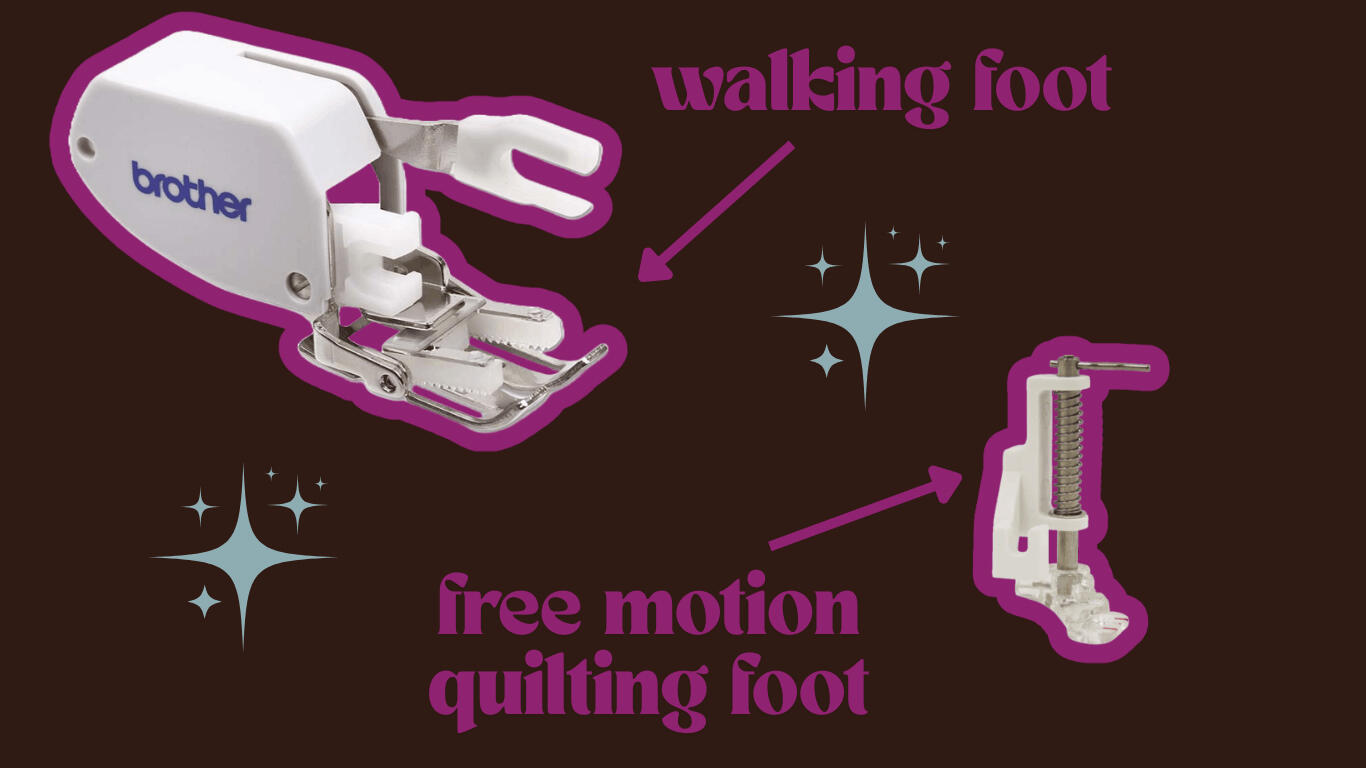
I usually go back and forth between the different feet, using a walking foot for most straight lines and a free motion foot for curves. You can combine whatever method works the best for you. Free motion quilting is very much a skill! It takes practice to control, and I’m definitely still improving on it. Make sure you cover or lower your feed dogs for free motion.
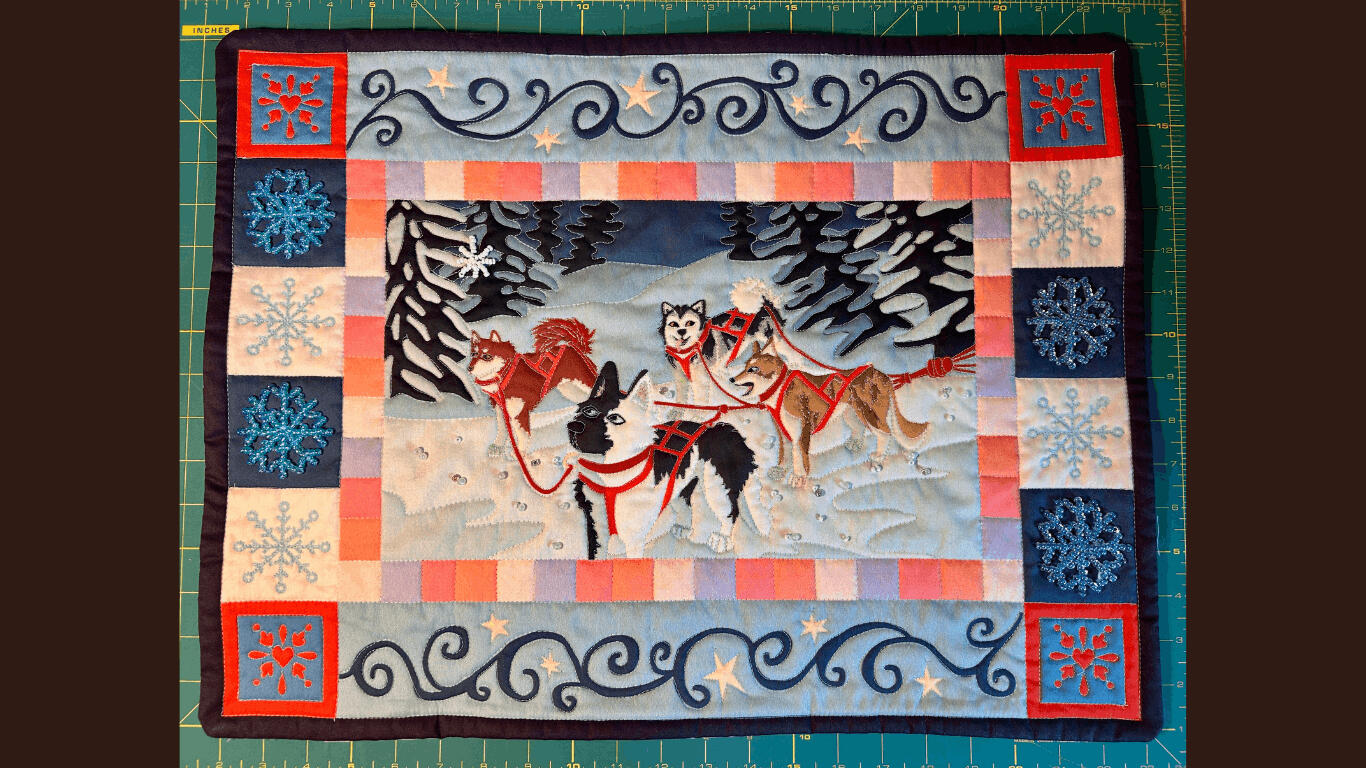
Step 4: You're Done!
Iron your quilt again, trim all the loose strings, and admire your work! Wholecloth quilting is such a unique method of artistic creation, and I hope you’ll love it as much as I do. In this finished quilt, I decided to add some beading; it's fun to experiment with mixed media.My DMs are always open to questions, don’t be scared to reach out!-Courtney